
Here are detailed instructions on how to get your application hosted in a production-quality environment!
HEROKU SETUP
Sign up for a Heroku account (it's free) at heroku.com.
From your dashboard, create a new app in Heroku using the "New" button in the top right. Select a unique name and then click "Create app". Once you do, go to the "Deploy" tab in the sub navbar menu. In the "Deployment method" area, click on the "Connect to Github" button. You'll need to authenticate with your Github account. Once you do, you'll see the following screen:
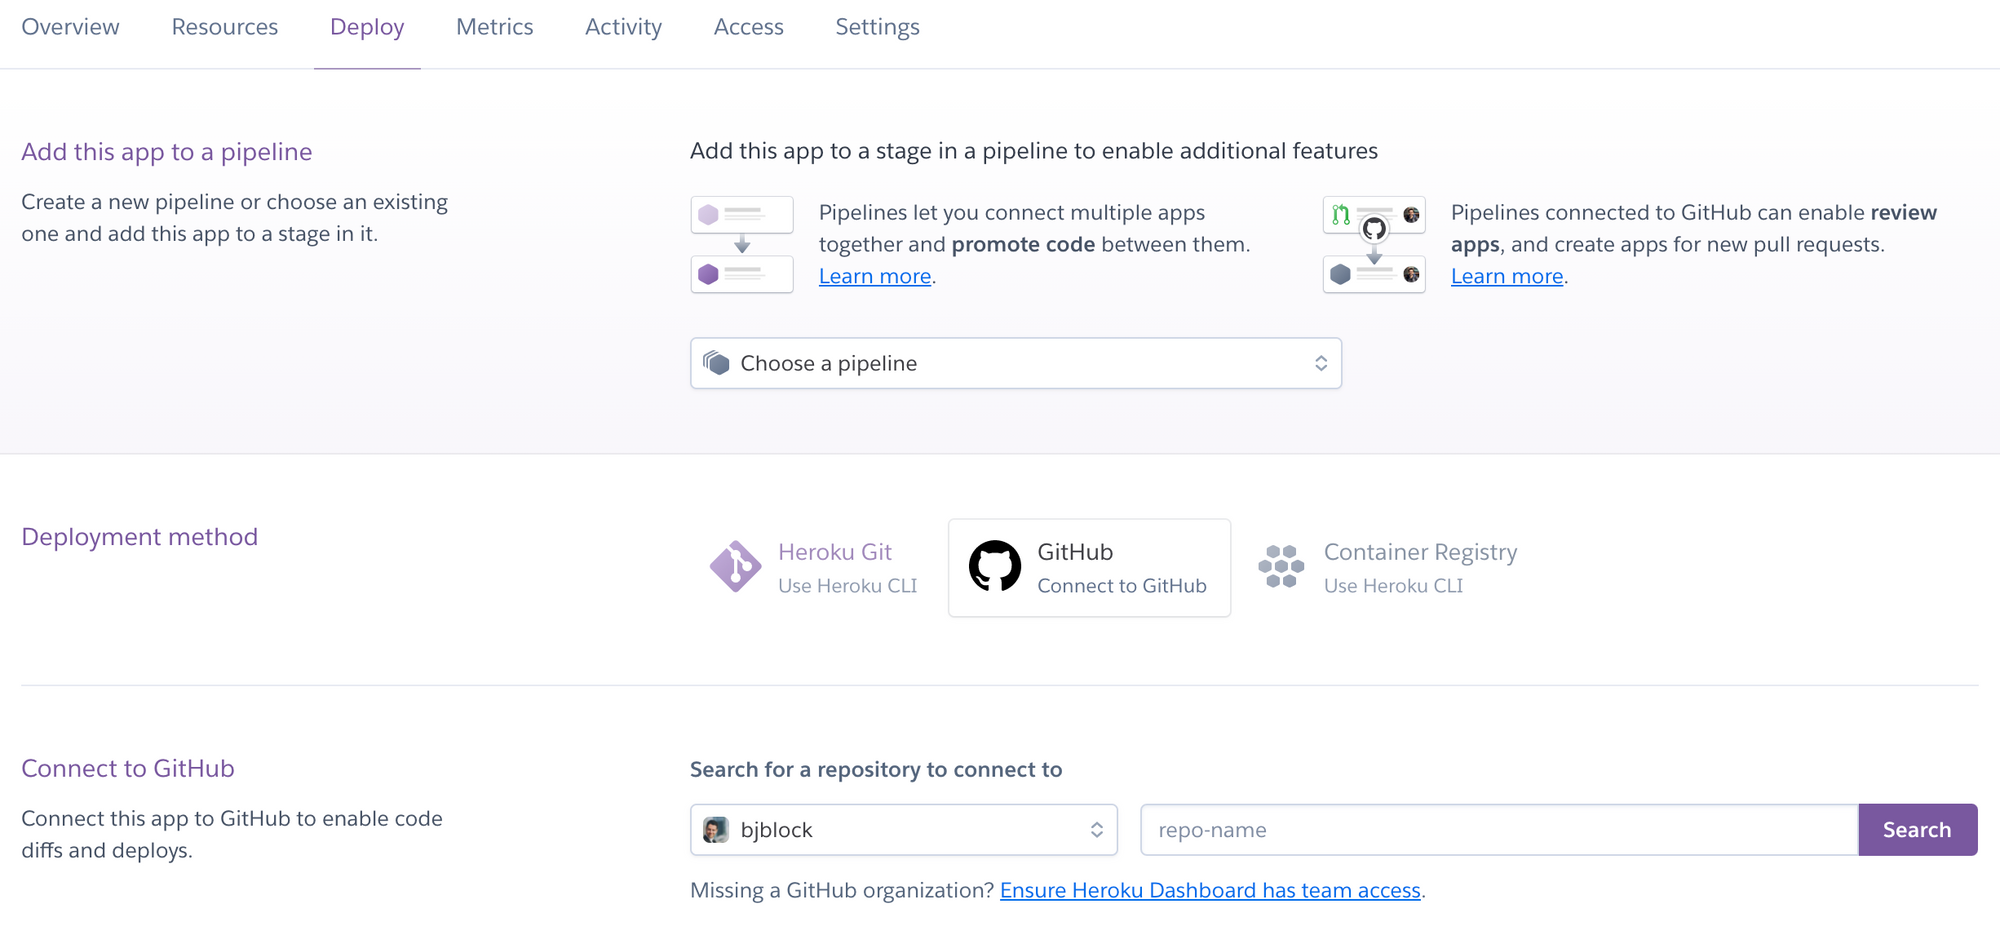
In the "Connect to GitHub" section, search for your repository that you want to deploy. Once you find it, click "Connect". Lastly, scroll down a bit further and click "Enable Automatic Deploys". From now on, each time you push new code from Gitpod to Github, it will get deployed to Heroku as well.
PREPARING YOUR APPLICATION
In your Gemfile, it may already look like it does below (specifically with the sqlite3 gem nested inside a group :development block and a pg gem nested inside a group :production block). If not, delete gem "sqlite3", "~> 1.4" and add the following:
group :development do
  gem "sqlite3", "~> 1.4"
  # note: keep other gems that were already in this group (e.g. web-console)
end

group :production do
  gem 'pg'
end
Note: there was likely already a group :development block in your code. If so, keep that code and just add the sqlite3 gem to that group. Don't delete any other gems in the group. For example, your code may now look like this:
group :development do
  gem "sqlite3", "~> 1.4"
  gem "tabulo"
  gem "web-console"
end
Once you've moved the sqlite3 gem and added the pg gem, execute the change in your Gemfile by running:
bundle installThese changes tell your Rails application to use the industrial-strength PostgreSQL database in production, instead of the sqlite3 database we've been using for development. The database will behave the same for our purposes, but is ready for production-level traffic and future scalability.
Next, you'll need to update the config/database.yml file. With the pg library installed for production, we also need to configure the app so that it knows where to find the production database. Currently, it lives in a file in the db directory (db/development.sqlite3), but in production the database is managed separately.
If it's not already there, add the following to the config file:
production:
  <<: *default
  adapter: postgresql
  database: my_app_production
  username: my_app
  password: <%= ENV["MY_APP_DATABASE_PASSWORD"] %>
Replace my_app in the example with the name of your app - in this case tacogram_final would be appropriate. Be sure that the database value still has production appended to it. And MY_APP in the password should be TACOGRAM_FINAL in all caps. As an example, it might look like this:
production:
  <<: *default
  adapter: postgresql
  database: tacogram_final_production
  username: tacogram_final
  password: <%= ENV["TACOGRAM_FINAL_DATABASE_PASSWORD"] %>
Last step is to commit these changes and push them to Github which will then be deployed to Heroku.
Congratulations! If all went well, your app should now be live! From Heroku, click the "Open app" button in the top right. This will open your live production site in a new tab. Note the url for future reference - it will be something like my_app.herokuapp.com where "my_app" is the name you gave this heroku app when you created it.
MIGRATIONS
Whenever you add new migration files (creating or modifying database tables), we run rails db:migrate in Gitpod to execute those migration files. The PostgreSQL database being used in production doesn't have any of the tables that your Gitpod application is using because those same migration files haven't been executed on heroku. So when you first deploy and on any subsequent deploys that include new migration files, you will need to run your migrations.
- Note: Check if your codebase has a file named
Procfilewith a line of coderelease: bundle exec rails db:migrate. That file will automatically run your migrations on every deploy. If you don't have aProcfile, follow the steps below instead.
From the app's dashboard on heroku, click the "More" button in the top right and then select "Run console" from the dropdown menu. This will open a panel where you can run the rails db:migrate command.

Once executed, you should see the output of your migration files and then "Process exited" in the bottom left of the panel. Your production database is now up-to-date.
DEBUGGING
Heroku is really just a big, industrial Linux-based computer – just like Gitpod, but more powerful. It's worth exploring the features of your heroku app to discover what's possible. One feature that's very useful is the access to the logs. In the top right, click the "More" button and then "View logs". This will display a panel with your application log. As you interact with your application as a user, you will see the output to the server log here. Just as we did with the rails server log in Gitpod, reading these logs will be helpful when you inevitably find a bug in the live app. You won't see the usual error message that you've seen in local development - that would be a bad user experience. Instead you'll see a simple 404 error screen with no details about what went wrong.
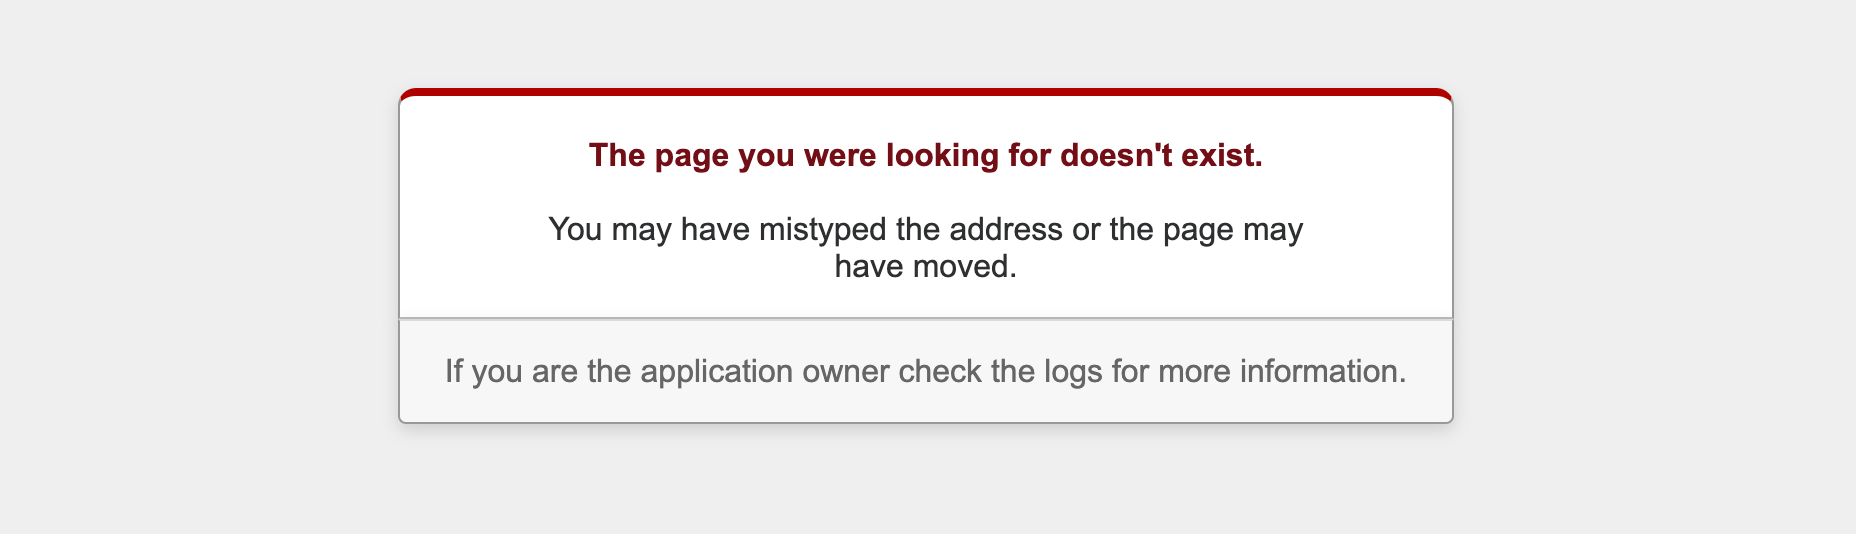
To see the actual error message, you'll need to look at the server log.