
Here are detailed instructions on how to get your application hosted in a production-quality environment!
PREPARING YOUR APPLICATION
In your Gemfile, it may already look like it does below (specifically with the sqlite3 gem nested inside a group :development block and a pg gem nested inside a group :production block). If not, delete gem "sqlite3", "~> 1.4" and add the following:
group :development, :test do
  gem "sqlite3", "~> 1.4"
  # note: keep other gems that were already in this group (e.g. "debug")
end

group :production do
  gem 'pg'
end
Note: there was likely already a group :development, :test block in your code. If so, keep that code and just add the sqlite3 gem to that group. Don't delete any other gems in the group. For example, your code may now look like this:
group :development, :test do
  gem "debug", platforms: %i[ mri mingw x64_mingw ]
  gem "sqlite3", "~> 1.4"
end
Once you've moved the sqlite3 gem and added the pg gem, execute the change in your Gemfile by running:
bundle installThese changes tell your Rails application to use the industrial-strength PostgreSQL database in production, instead of the sqlite3 database we've been using for development. The database will behave the same for our purposes, but is ready for production-level traffic and future scalability.
Next, you'll need to update the config/database.yml file. With the pg library installed for production, we also need to configure the app so that it knows where to find the production database. Currently, it lives in a file in the db directory (db/development.sqlite3), but in production the database is managed separately.
If it's not already there, add the following to the config file:
production:
  <<: *default
  adapter: postgresql
  database: my_app_production
  username: my_app
  password: <%= ENV["MY_APP_DATABASE_PASSWORD"] %>
Replace my_app in the example with the name of your app - in this case tacogram_final would be appropriate. Be sure that the database value still has production appended to it. And MY_APP in the password should be TACOGRAM_FINAL in all caps. As an example, it might look like this:
production:
  <<: *default
  adapter: postgresql
  database: tacogram_final_production
  username: tacogram_final
  password: <%= ENV["TACOGRAM_FINAL_DATABASE_PASSWORD"] %>
Last step is to commit these changes and push them to Github.
RENDER SETUP
Sign up for a Render account at render.com - use your Github credentials if possible. You may have to enter payment info, but you'll be using the free tier. During signup, you'll be asked several questions about how you will use Render - you can answer them however you'd like. Once complete, you'll be on your Render dashboard.
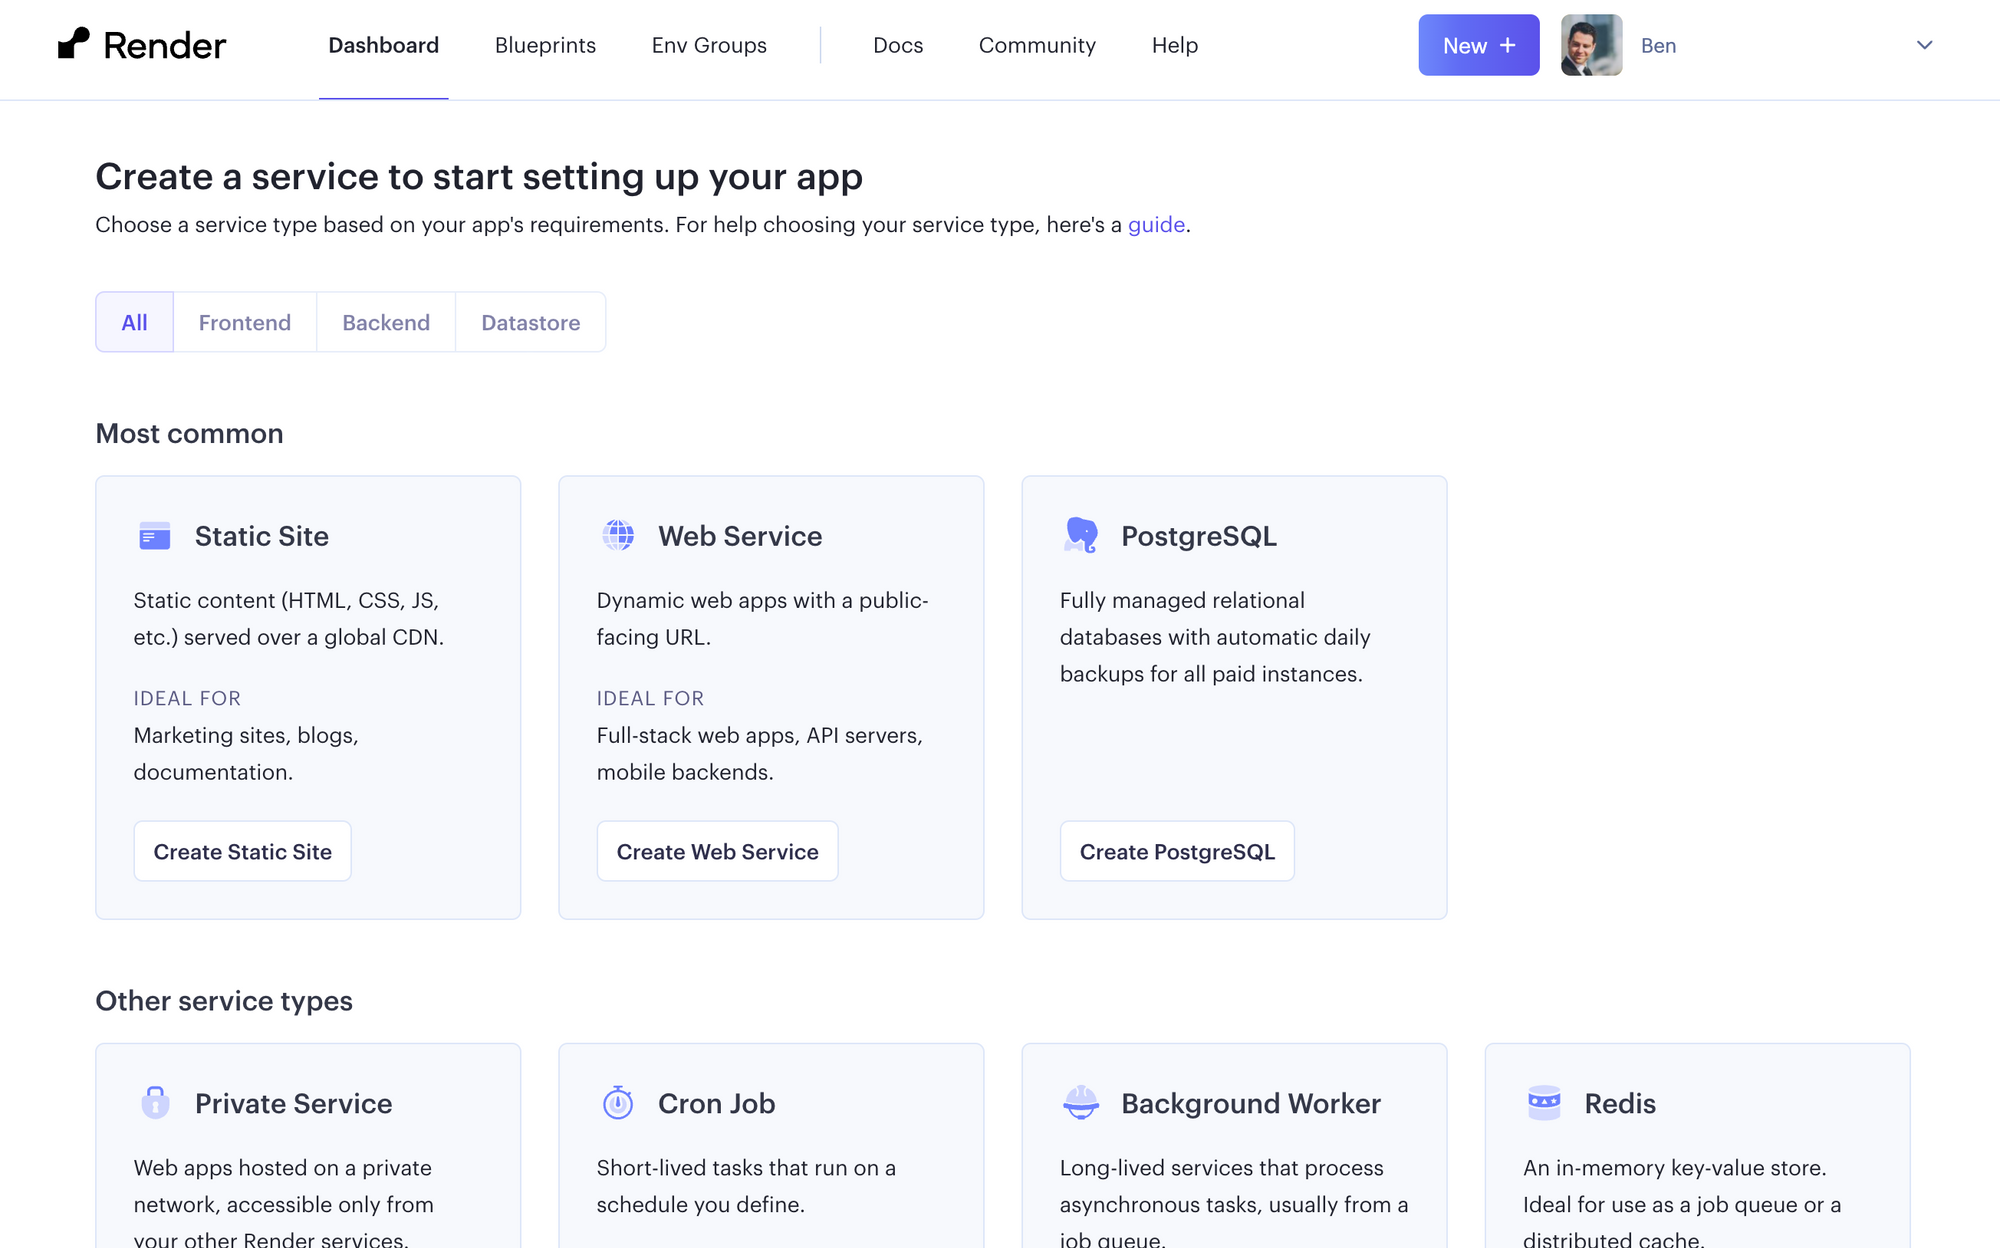
You'll need to create 2 services - one for the database and one for the application. Create the database service first. Click "Create PostgreSQL" on your dashboard (or using the "New +" button in the top right).
In the form, enter a unique name for your new database - it's helpful to use your application name followed by "-db" to easily identify it later. For example, it might be tacogram-final-db.

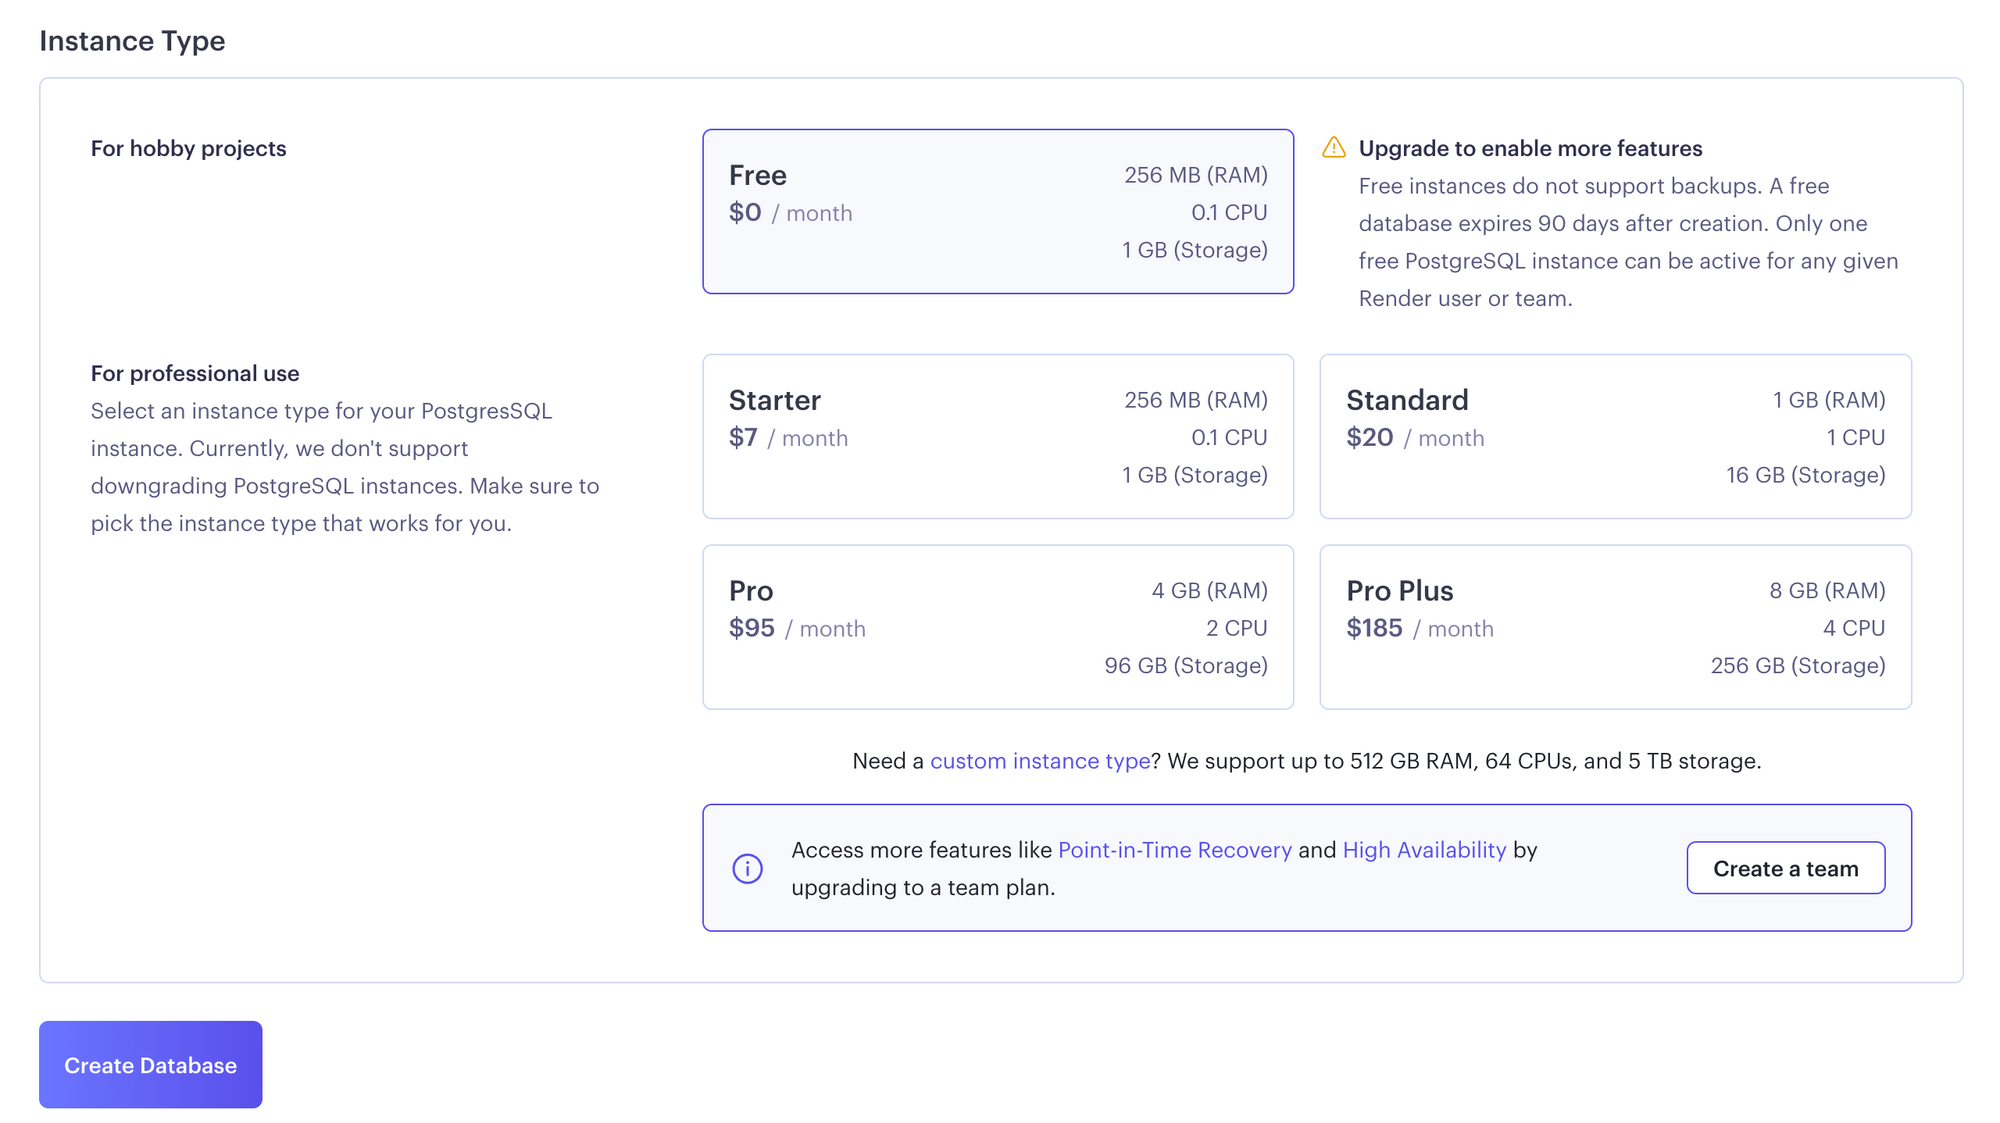
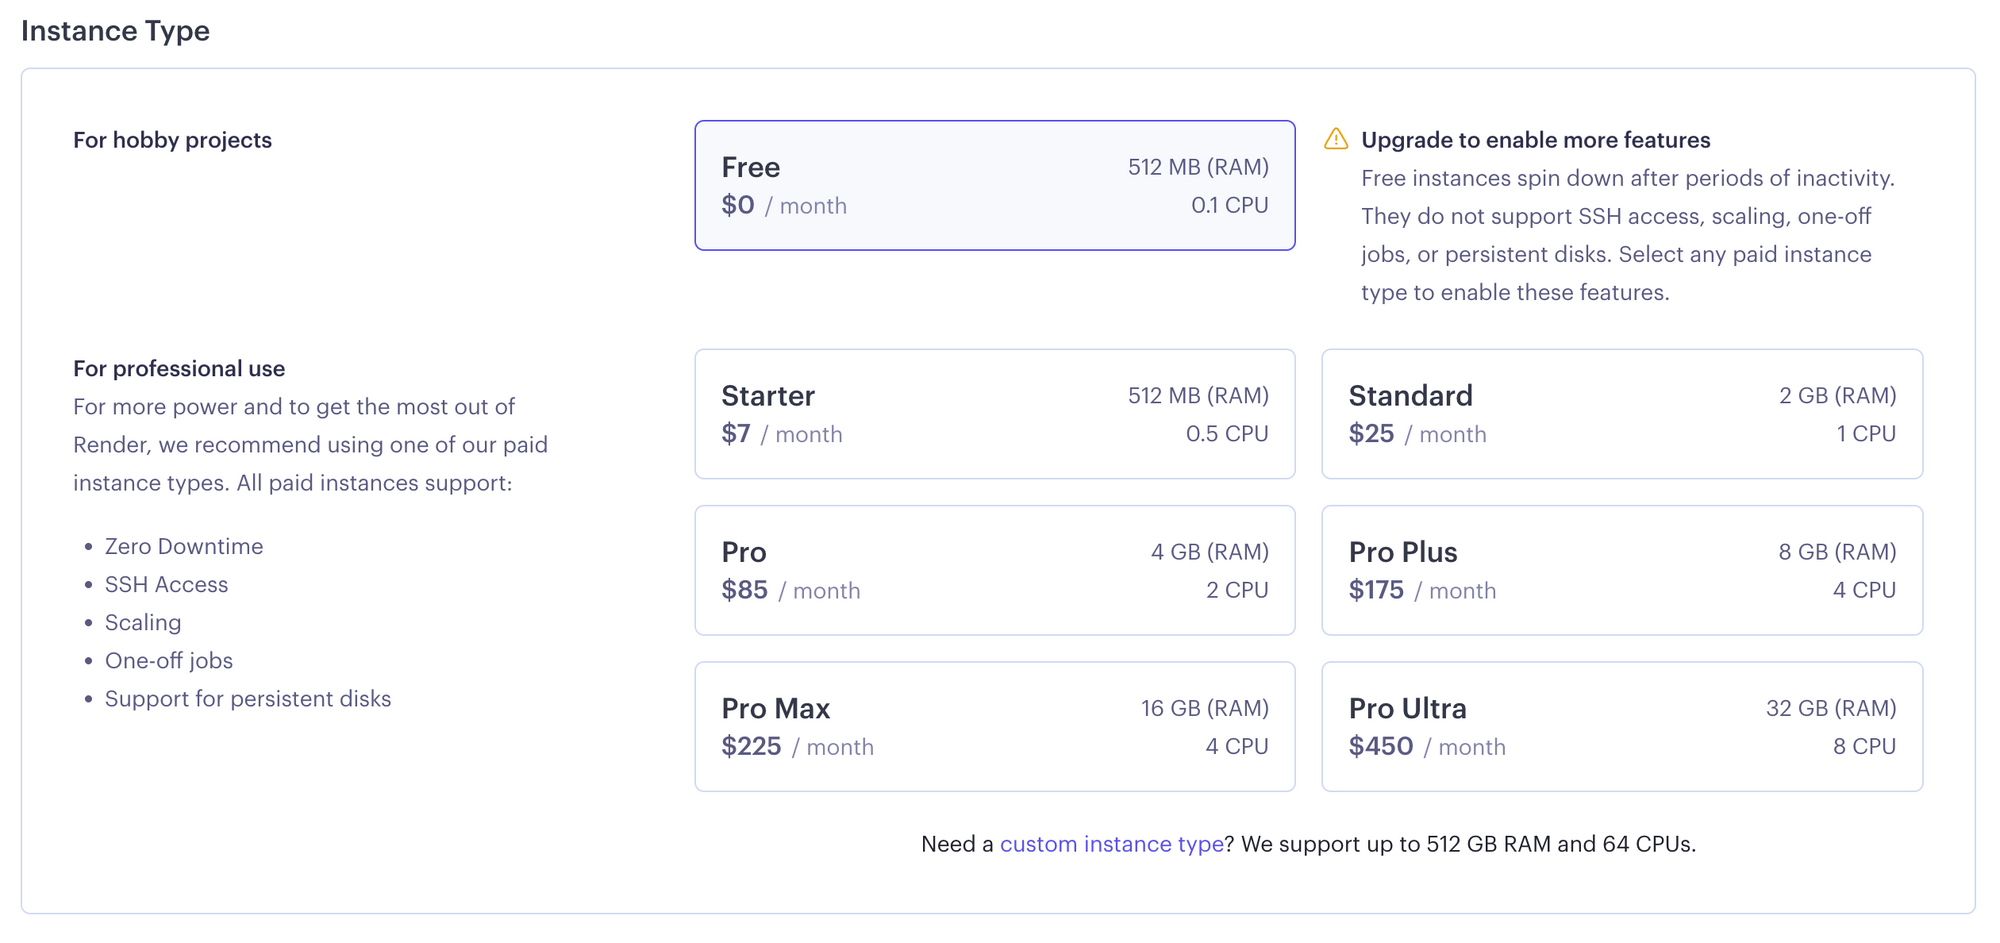
Ignore the other settings in the form until the Instance Type at the bottom. Select the "Free" type and click "Create Database". Note: Render only permits 1 free database service. When you want to create a database for another application, you'll first need to suspend/delete this one (or upgrade to a paid plan).
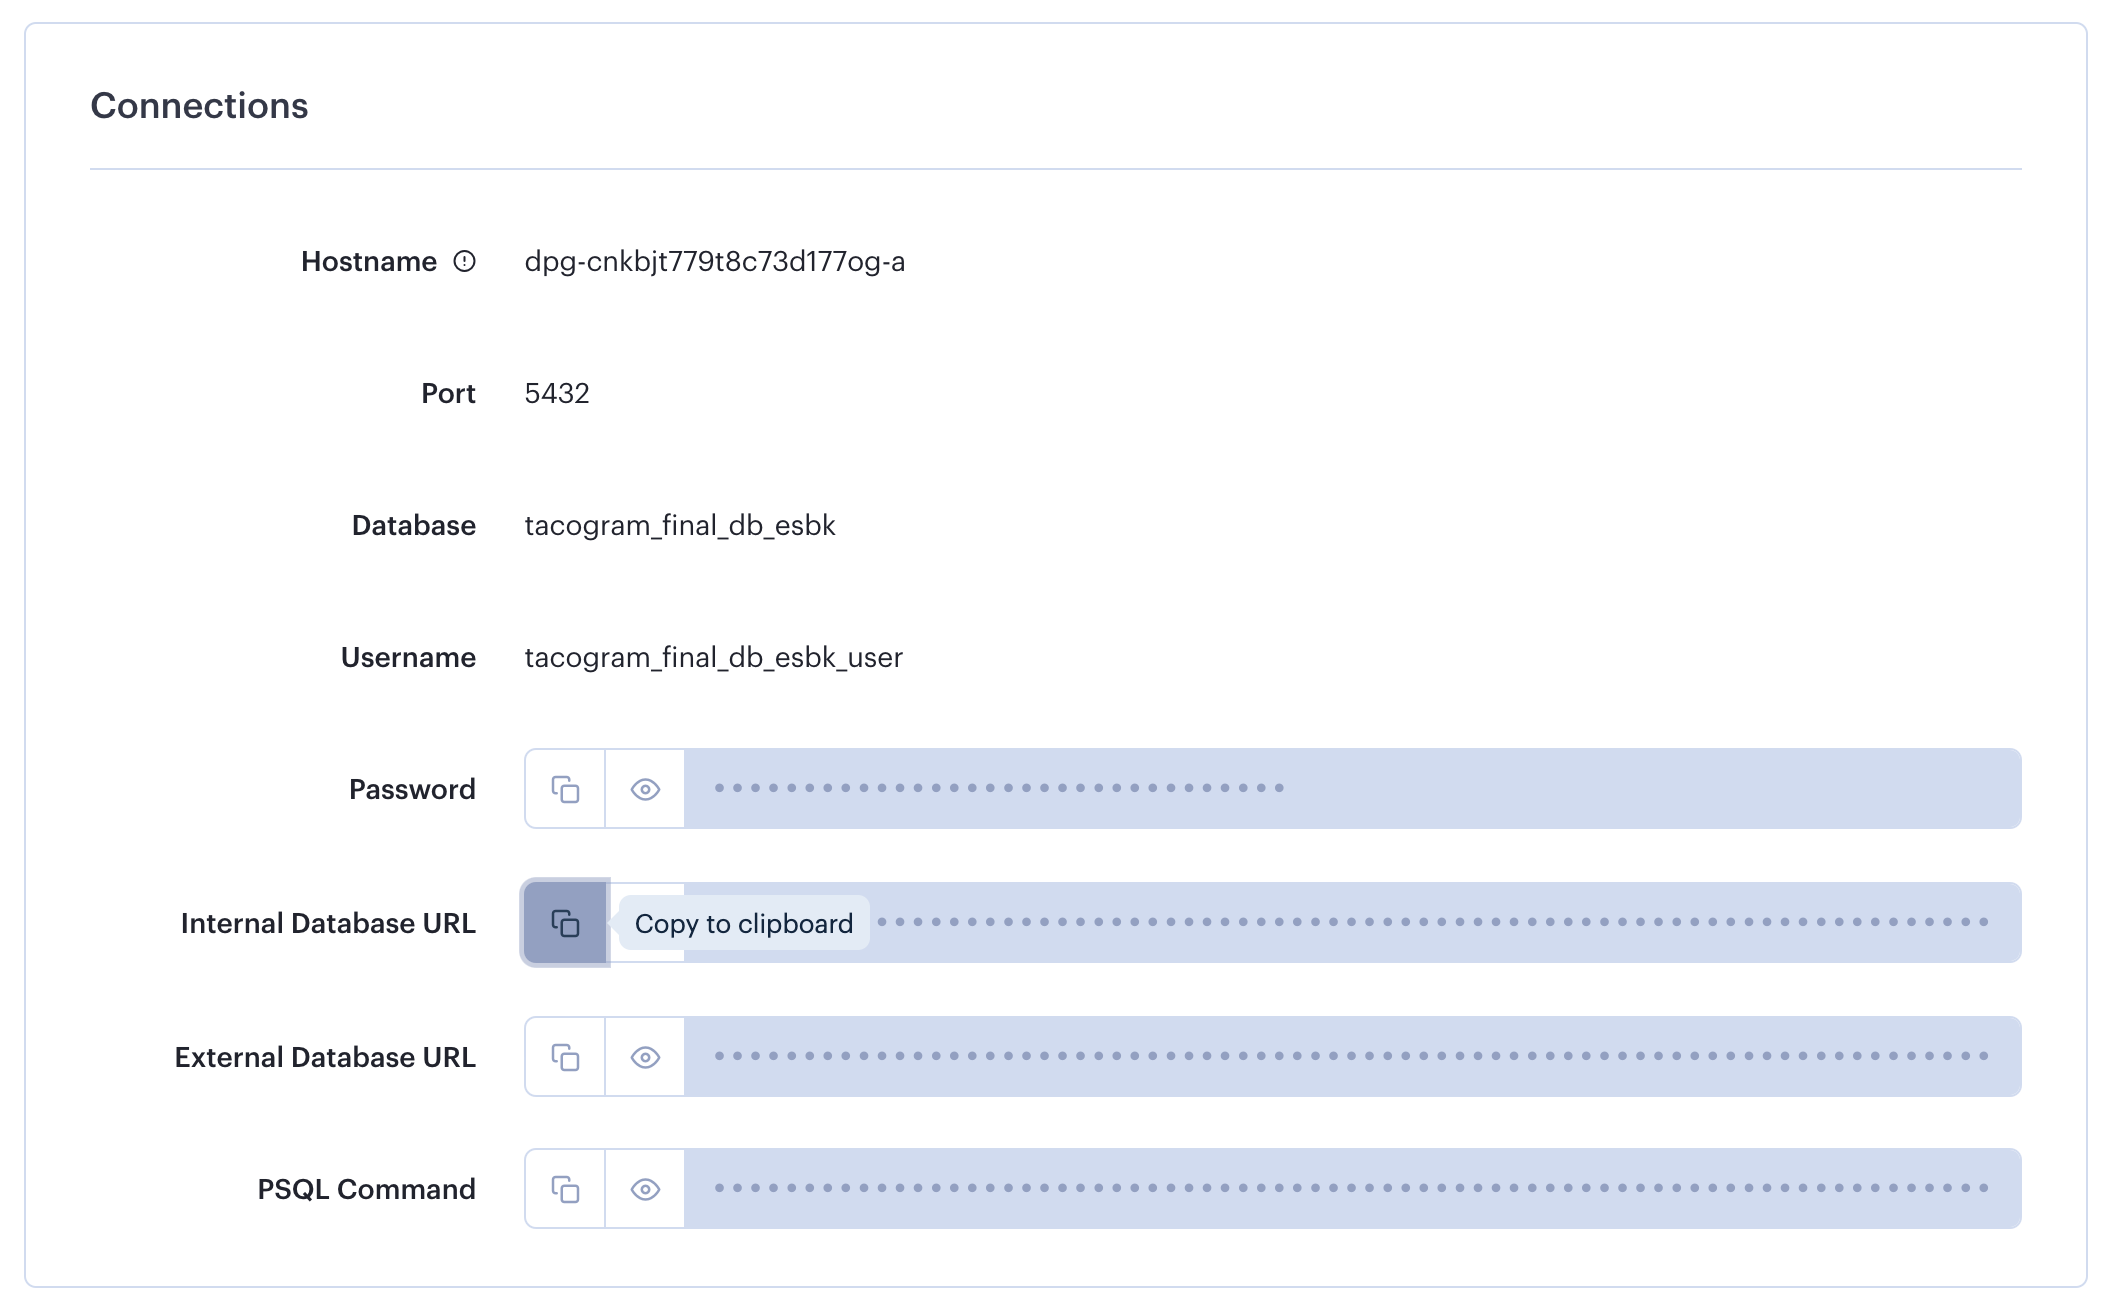
On the next screen, wait for the database service to complete its setup. Once it's available, scroll to the "Connections" section, find the "Internal Database URL" value and copy it - you'll need it in the next step.
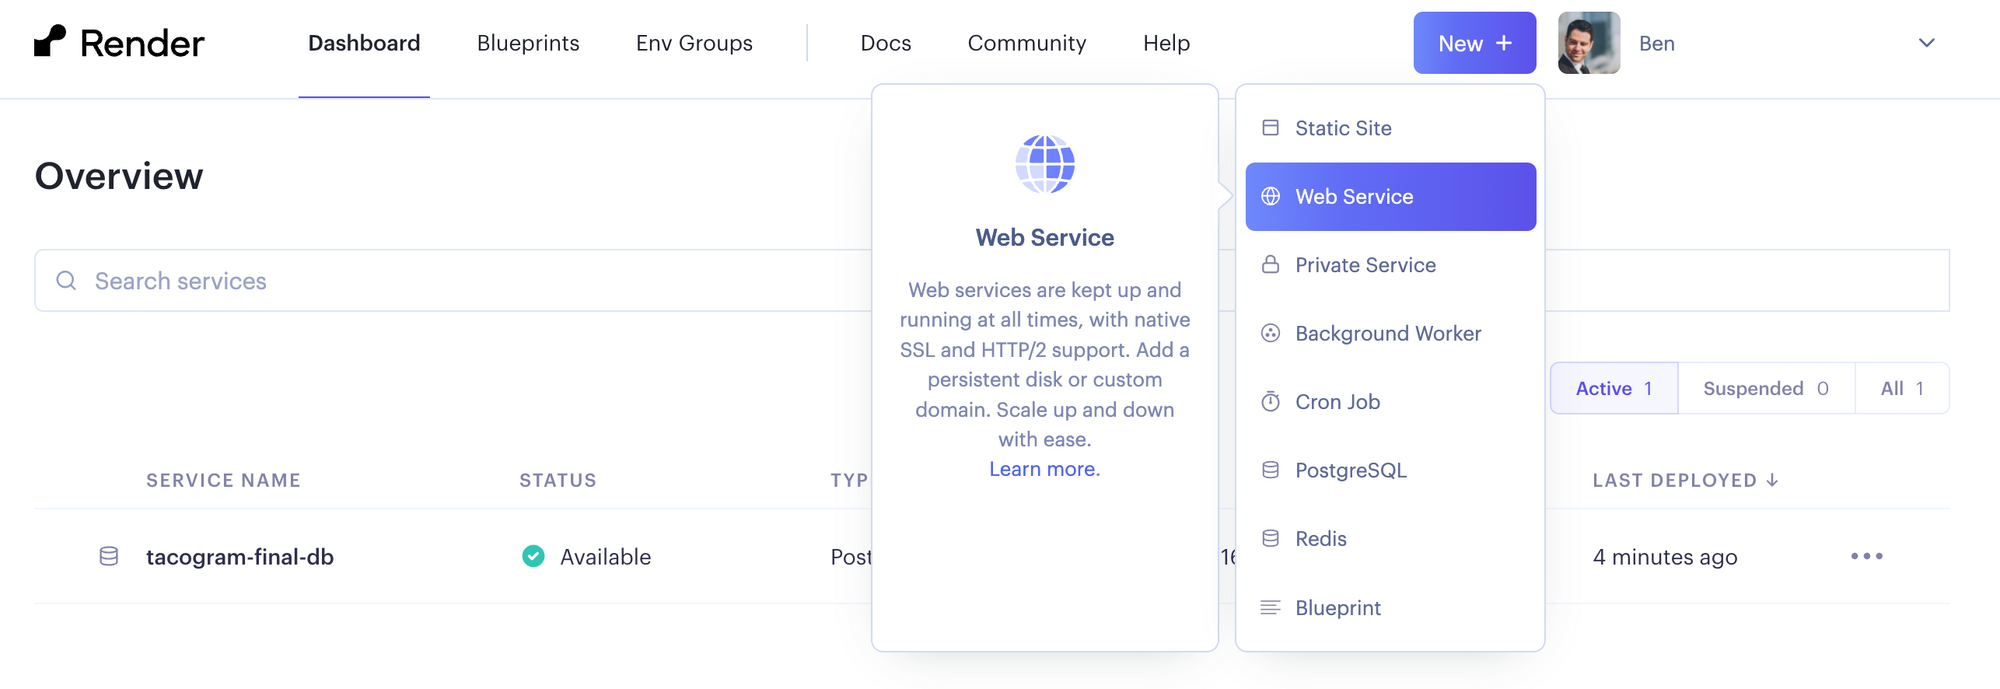
Next, go back to your dashboard and click the "New +" button in the top right to create a new Web Service.
When asked "How would you like to deploy your web service?", choose "Build and deploy from a Git repository". On the next screen, you'll be asked to "Connect a repository" - you should see your Github repository listed, but if not, click "Configure account" on the right to authorize access to your Github account. Once you've found your application's repository in the list, click "Connect".
In the following form, the "Name" field will be pre-populated for you based on the name of your application. However, this must be unique across all of Render, so you may need to change the name slightly (e.g. tacogram-final may already be taken). You can leave the next few settings unchanged. Then, in the "Build Command" field, enter the 2 commands that should run each time you deploy a new version of your application: bundle install; rails db:migrate (the semi-colon separates the 2 commands).
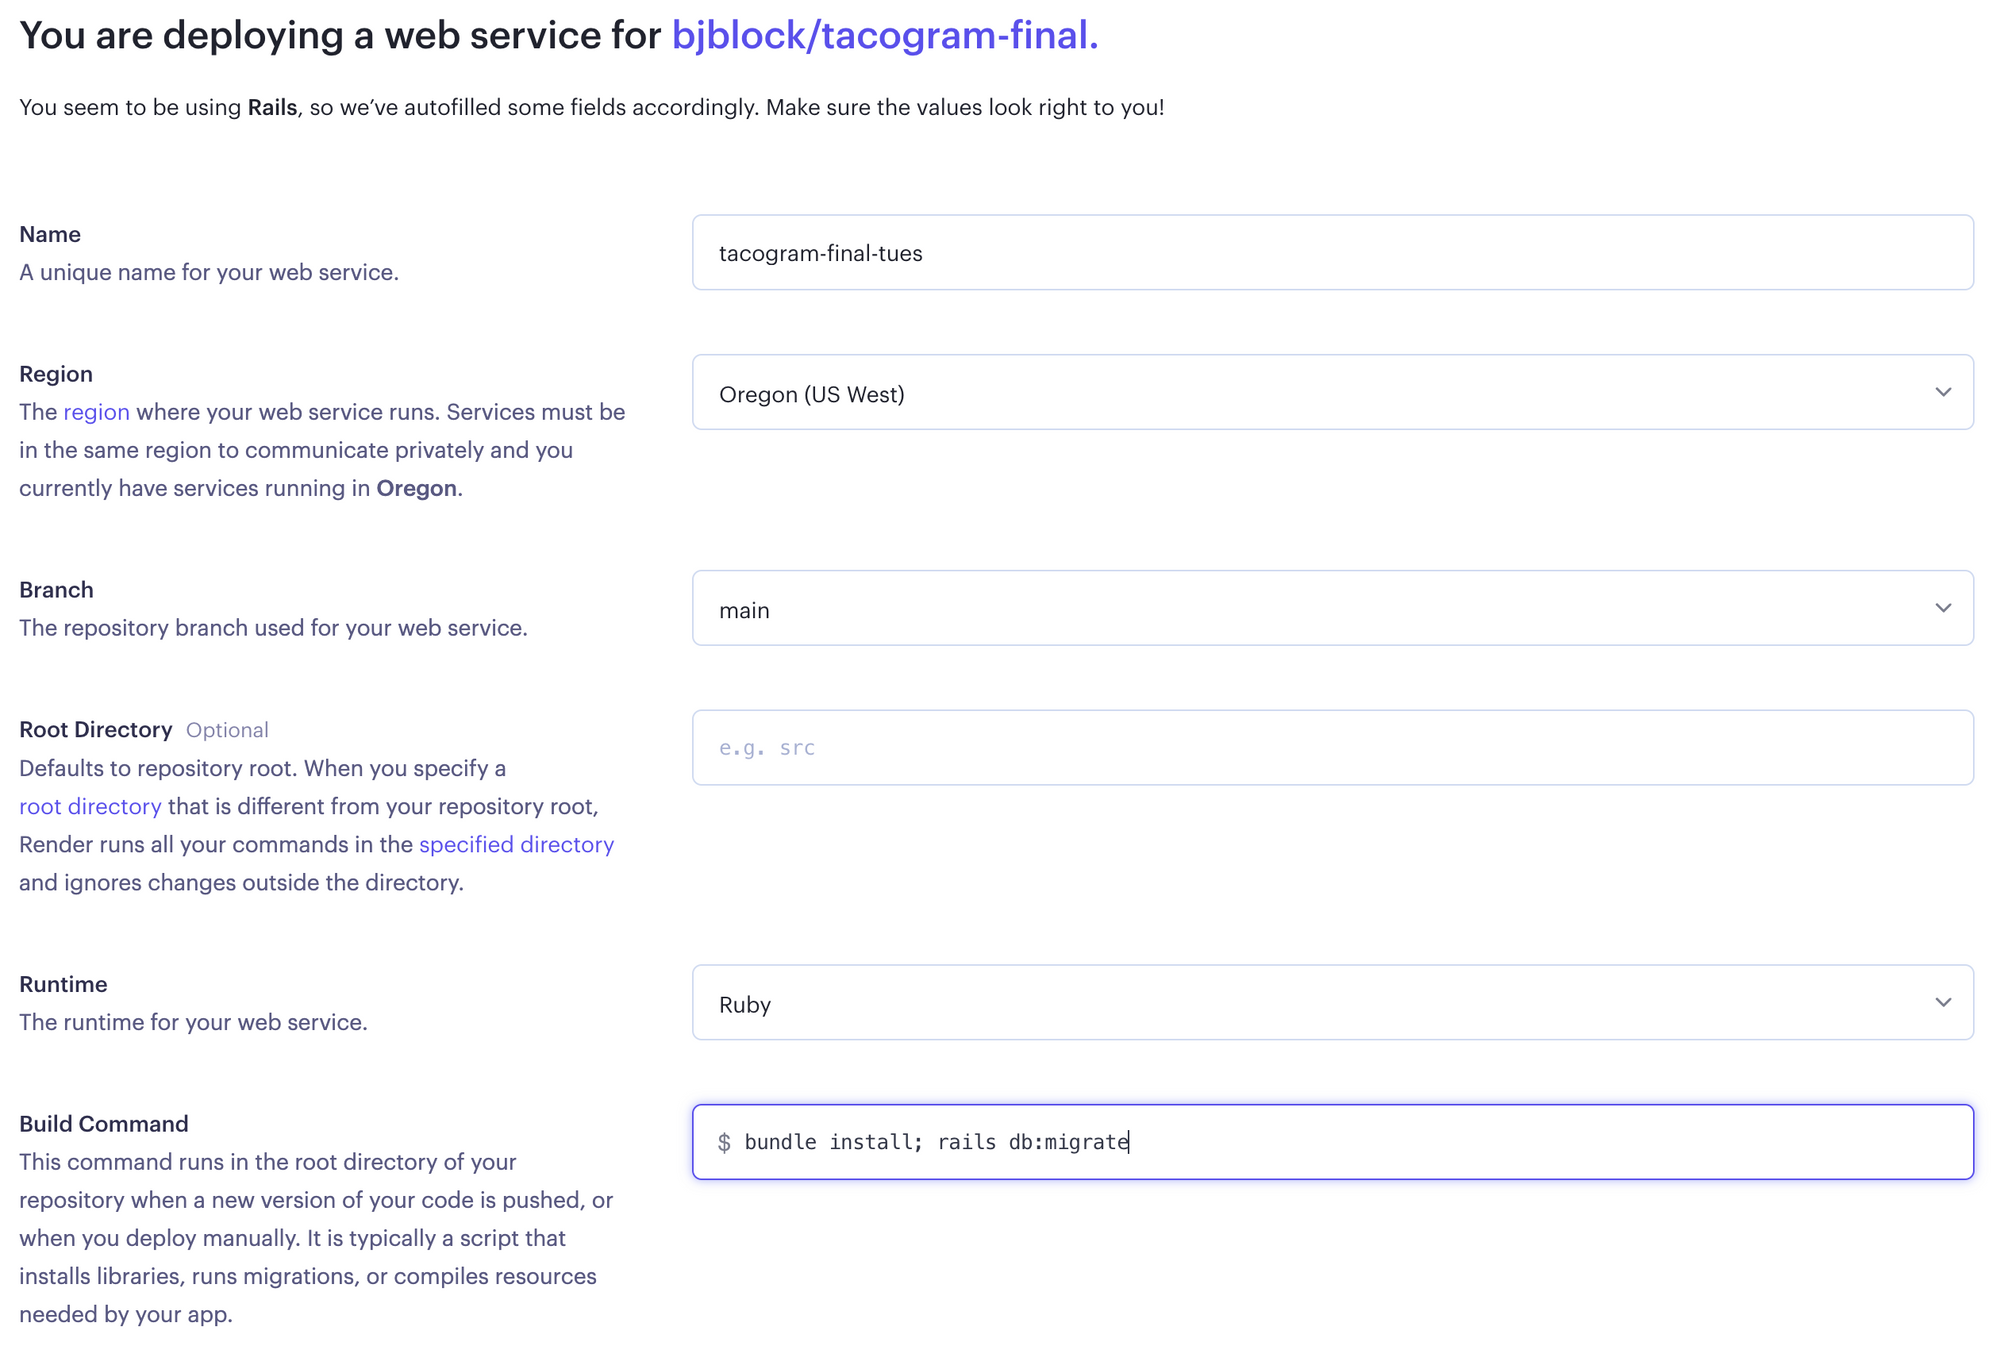
Next, change the "Start Command" field. This is the command that will run to start your application server, just like you do in Codespace: rails server

Then, choose the free Instance Type option.
The last change is adding environment variables needed to run the application - these are variables stored on the "server" instead of in our code and generally used to run the application or for sensitive data we don't want to store in our code (e.g. API keys). The variables you'll need to add are:
- DATABASE_URL
- SECRET_KEY_BASE
- WEB_CONCURRENCY
The DATABASE_URL value should be the "Internal Database URL" value copied from the database service. The SECRET_KEY_BASE value can be anything - your application name will work. And, the WEB_CONCURRENCY value should be 2.

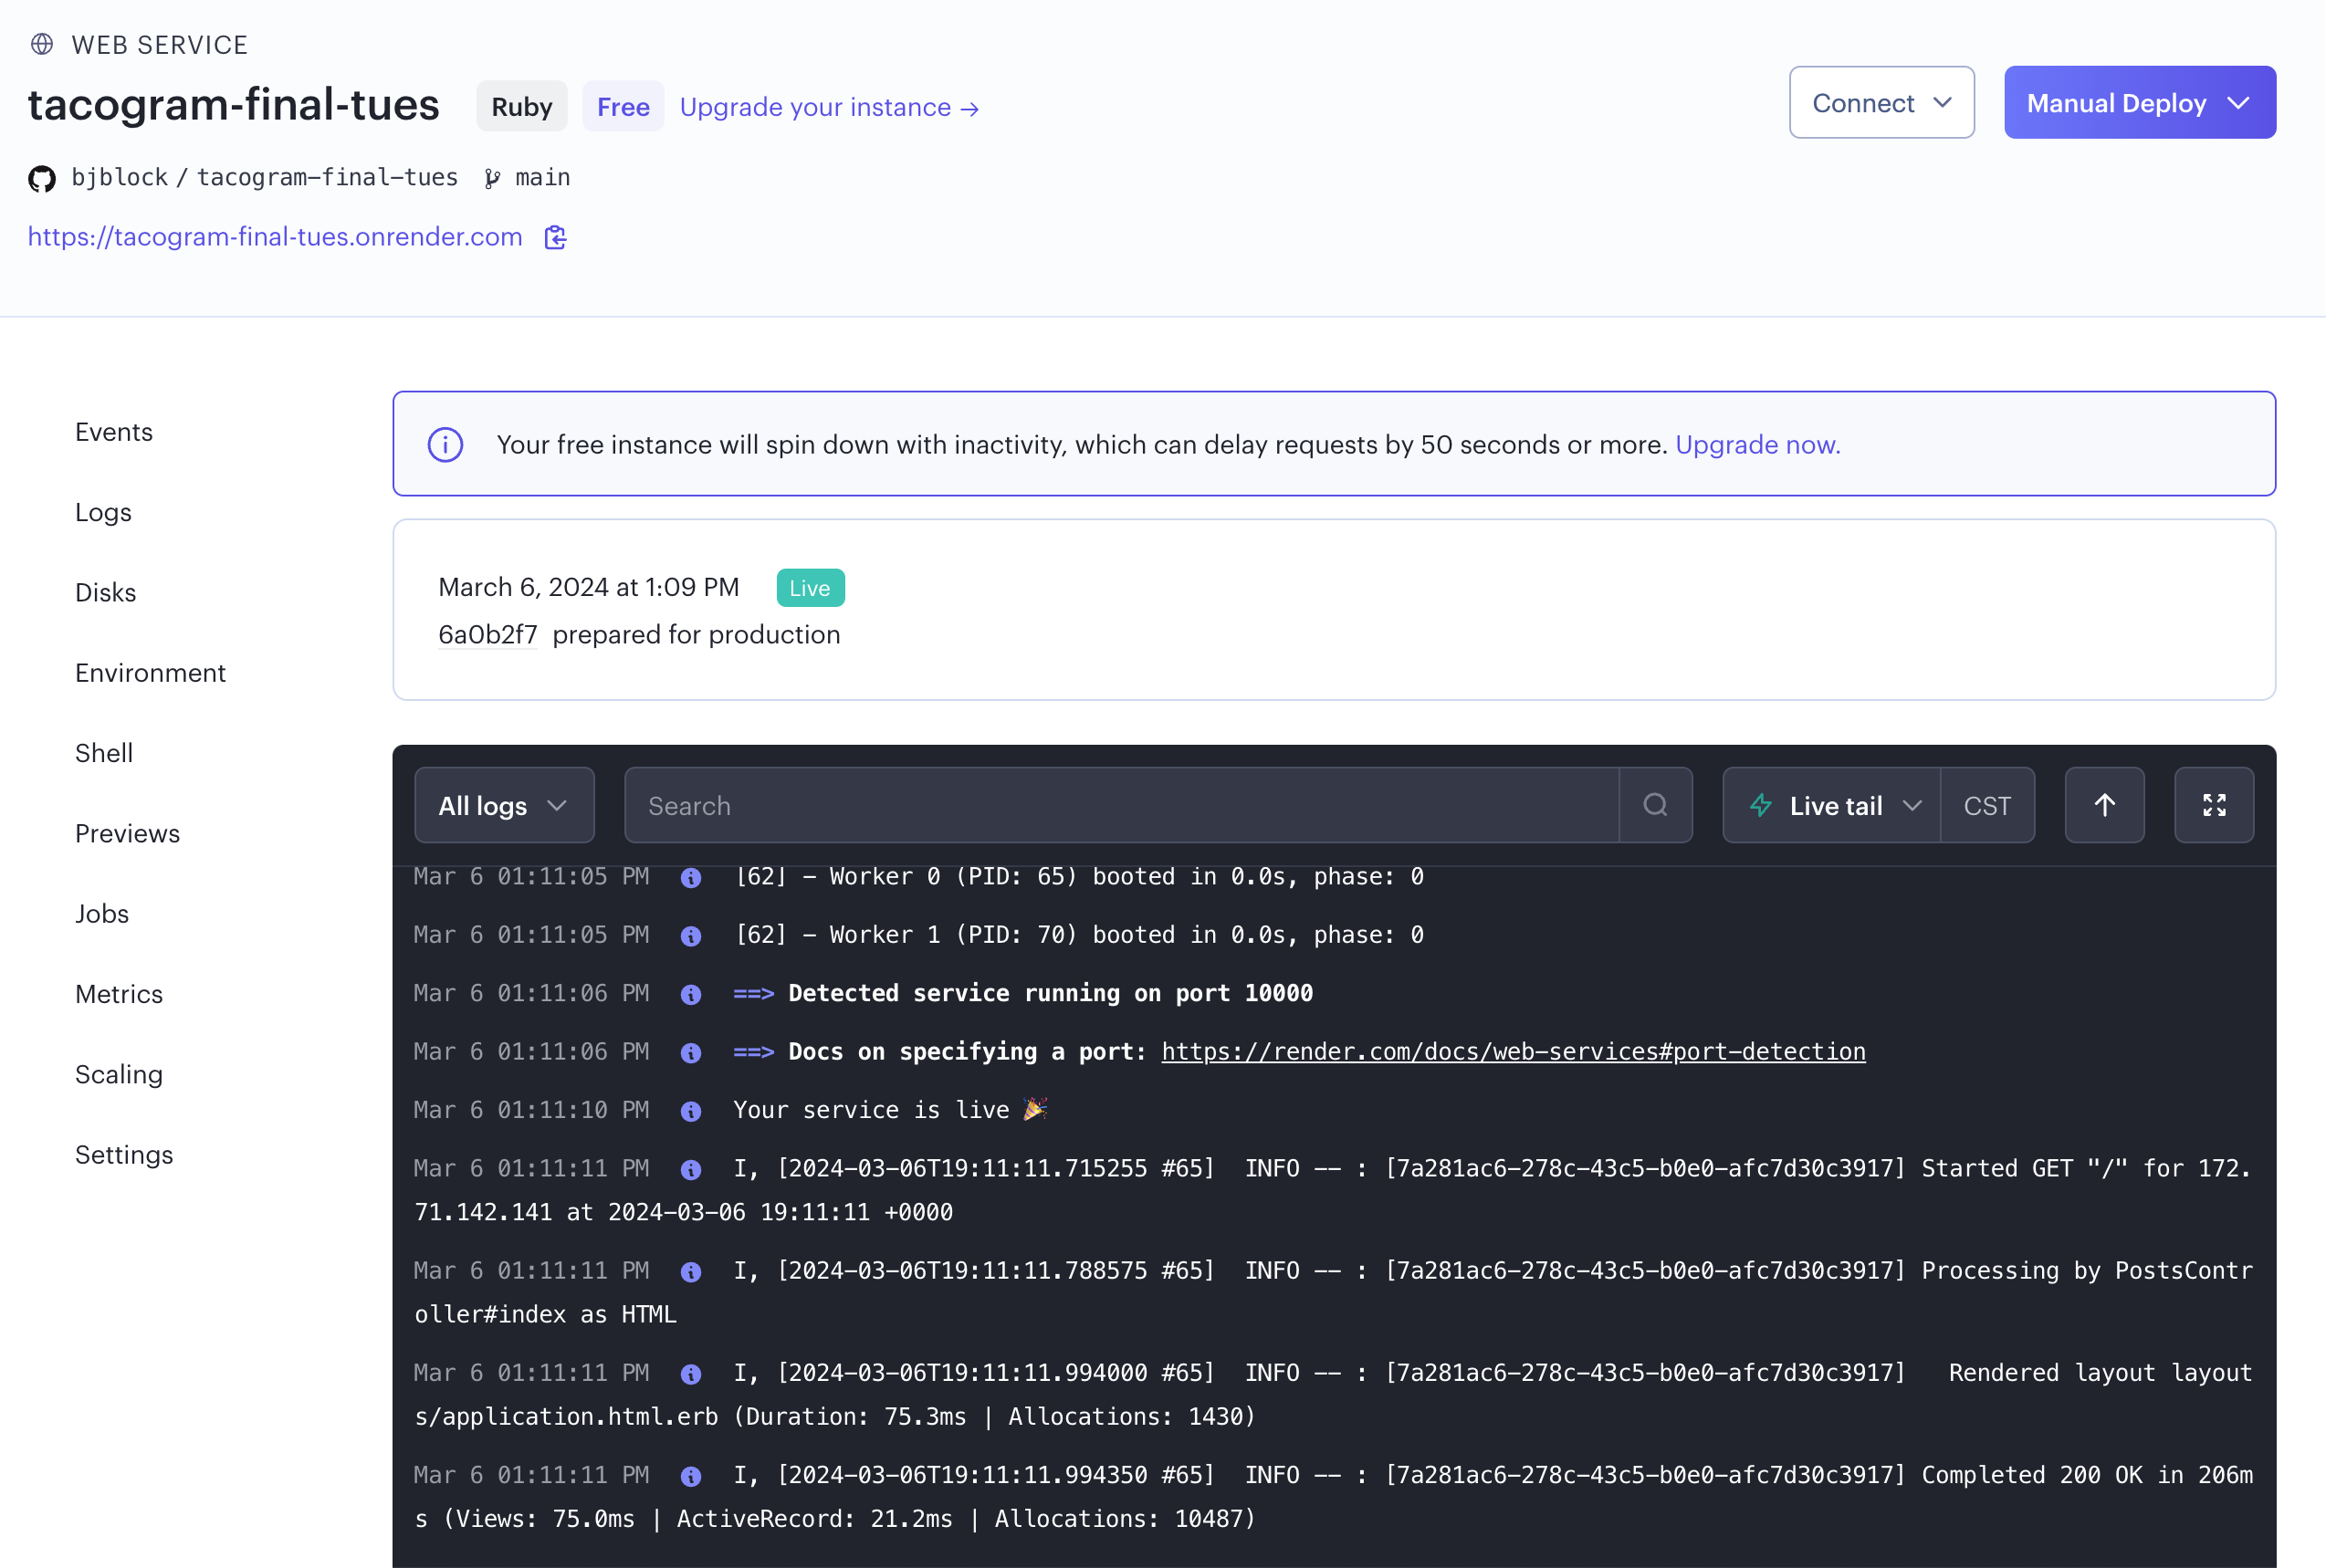
That's it. You can click "Create Web Service" to complete the setup. Render will pull your latest code from Github and begin to install all of the necessary libraries. It will automatically run bundle install and rails db:migrate. And then lastly, it will run rails server. If all goes well, you'll see "Your service is live 🎉" in the logs.
From now on, each time you push new code from Codespace to Github, it will be deployed to Render as well. You can see any deployment events listed in the "Events" tab.
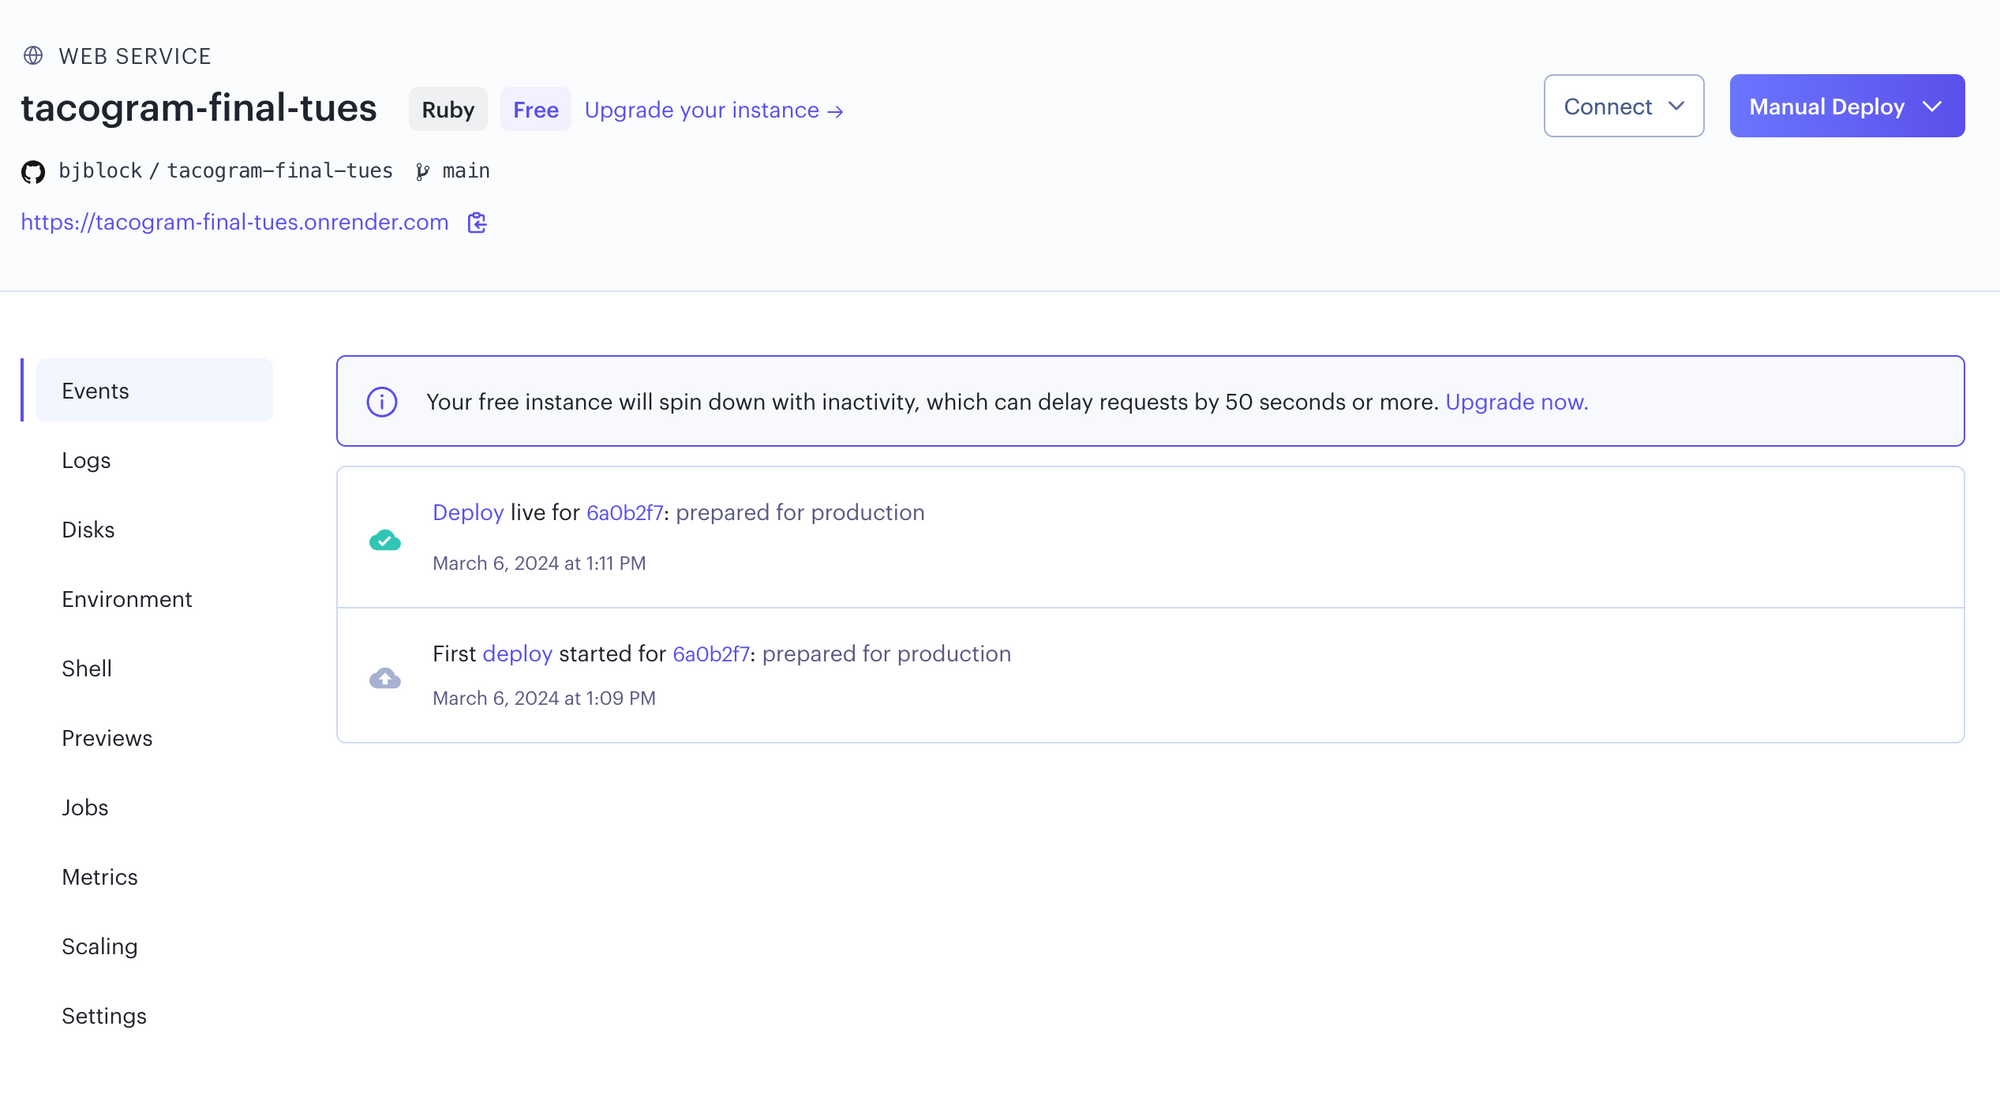
Congratulations! Your app should now be live! There's a link to visit your live production site towards the top. Note the url for future reference - it will be something like my_app.onrender.com where "my_app" is the unique name you entered previously (e.g. tacogram-final-tues).
DEBUGGING
Render is really just a big, industrial Linux-based computer – just like Codepsace, but more powerful. It's worth exploring the features of your Render services to discover what's possible. One feature that's very useful is access to the logs (see the "Logs" tab just below the "Events" tab in Render. As users interact with your application, you will see the output to the server log there. Just as you did with the rails server log in Codespace, reading these logs will be helpful when you inevitably find a bug in the live app. You won't see the usual error message that you've seen in local development - that would be a bad user experience. Instead you'll see a simple 404 error screen with no details about what went wrong.
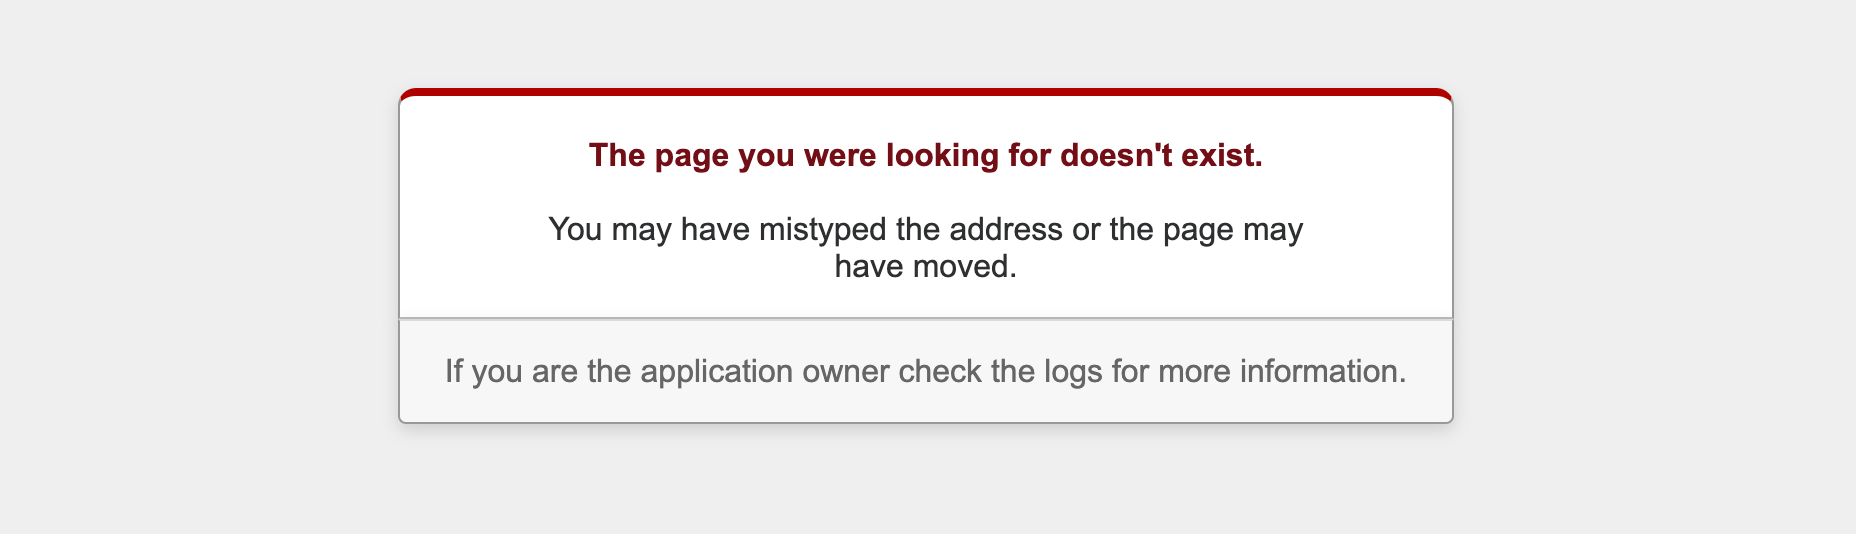
To see the actual error message, you'll need to look at the server log. Render makes this especially easy by providing search and filter functionality for your logs.
CUSTOM DOMAINS
If you're interested in adding a custom domain to your application (e.g. tacogram-final.com instead of tacogram-final.onrender.com), you'll first need to purchase a domain (or use a domain you already own) at a domain registry provider like Namecheap. Then follow Render's instructions to configure the domain to point to your server on Render.