Making very basic changes to our code files within GitHub works perfectly fine, but soon enough, we must graduate to a more full-featured development environment. The development environment is a generic term used to describe the hardware, operating system, and software necessary for a developer to do his or her job. The following are just a few examples of a development environment:
- Apple MacBook Pro (hardware) + Mac OS (operating system) + Atom (code editor)
- Apple iMac (hardware) + Mac OS (operating system) + XCode (code editor)
- Microsoft Windows Surface Pro (hardware) + Windows 11 (operating system) + Microsoft Visual Studio Code (code editor)
- Lenovo Thinkpad X1 Carbon (hardware) + Ubuntu Linux 20 (operating system) + Microsoft Visual Studio Code (code editor)
Of course, in addition to the hardware, OS, and code editor, we must add other job-specific tools, such as a web server (for web developers), device emulators (for mobile developers), and hardware development kits (for IoT developers). The possibilities are endless.
As mentioned previously, we are going to be working on building web applications in this course. We could spend a few hours installing the command-line interfaces, web servers, and other applications needed to build them, specific to the computer hardware and operating systems you might have, debugging and tweaking what we need along the way. Or, we could use a cloud-based development environment, which includes 100% of what we need, already packaged up and ready to go. This, of course, is the value proposition of Github Codespaces – an all-in-one (i.e. dedicated hardware, OS, application software, and code editor), cloud-based development environment that will put all the setup and infrastructure behind us, and get us to coding right away.
Getting Started
Assuming you already have a Github account, getting our development environment up-and-running is (mostly) a click away.
Head over to the hello-world repository you created in the last lesson. If you can't find it, head over to your Github home page and look on the left-hand side under Repositories. On the project page for the repository, click the button that says Code, select the Codespaces tab, then click the "Create codespace" button.
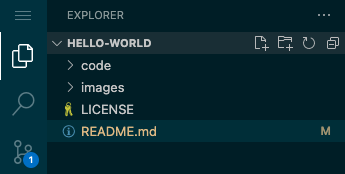
If everything goes smoothly, you should be launched into the Codespaces development environment, with a column of folders and files contained within your hello-world project on the left-hand side. You might see a Welcome page – feel free to close it.
Click on README.md on the left-hand side (the area known as the Explorer); you should see the editable contents of that file appear on the right (the Editor).
Editing, Committing, and Syncing Files in your Codespace
Go ahead and make a change – any change – to your README.md file. Changes are auto-saved automatically by default, so there's no need to worry about saving yourself. When you make a change, you'll immediately see the file you're working on change color in the Explorer.
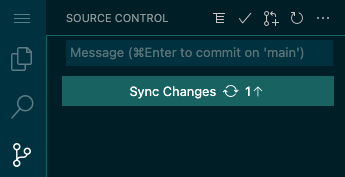
Notice the funny icon (the one that looks like branches) now has a (1) next to it? That's letting you know that you've made 1 change since the last time this code was committed. If you click on that icon, you'll find yourself in the Source Control pane.
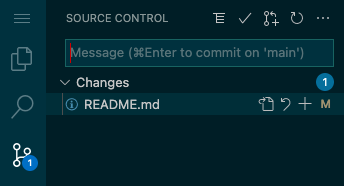
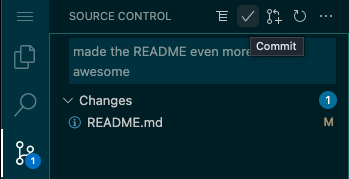
When you're ready to commit your changes, the process is essentially the same as when we did it using GitHub's web-based interface. The Message that it's asking for is the commit message, i.e. a description of this unit of work that you're about to commit. Enter a message and hit the check mark icon (✔️) to commit.
This being the first time you're committing changes, you'll be asked what you want to do:
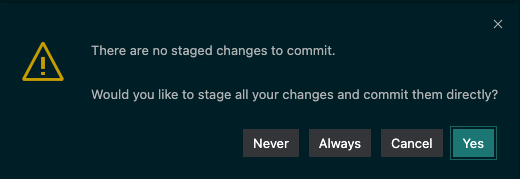
You can either select Yes here, or Always, so you don't see this message again. At this point, you've successfully committed your changes to your local Git (i.e. the Git software that runs on the cloud-based computer that we're using), but you have not yet sent those changes back to GitHub. To do so, click the Sync Changes button.
Since it's the first time syncing (see a theme here?), you'll see this prompt:
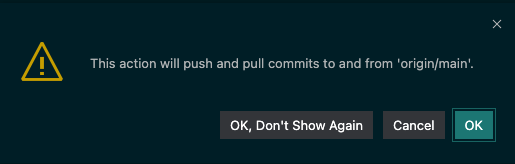
Click OK, Don't Show Again. What we're saying here is, when you hit Sync Changes from now on, push my changes to GitHub, and also get changes from the GitHub-hosted repository, if there are any. Because we're not working in teams (yet), the pulling of commits will almost always do nothing.
Along the same lines, you'll also be asked:

Again, because we're not working in teams or otherwise won't have multiple contributors to the same online GitHub repository, this doesn't really matter – it's simply asking if you want to automatically pull changes from the hosted repository on GitHub every few minutes. You can safely click either option.
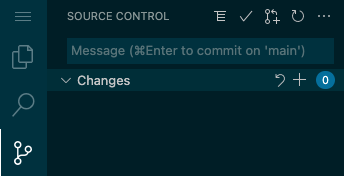
It's always a good idea to confirm that your commit made it to your GitHub repository by going to the project page.

How often should you commit and sync?
Now that you know how to edit code, commit, and sync, it begs the question: how often should you do it? After all, there's nothing to physically prevent you from writing 10,000 lines of code across 200 different code files, then commit and sync it all. (Spoiler alert – don't do that.)
The answer can vary based on the culture of the company/development team that a software developer works with, but in general, each commit should represent a single unit of work. Some examples of a unit of work might be:
- Built a feature
- Added a user-interface element
- Modified some documentation
Again, there's usually no hard-and-fast rule as to when to commit/sync, but broadly speaking, some good guidelines to follow are:
- Commit when you have something worth committing – e.g. a working feature or a big step toward a larger goal.
- Don't commit code that is broken – don't use commits to "save" your code to disk in the cloud, just for the sake of doing it.
- Commit as often as possible, BUT – it's based on the work, not the time. You could potentially commit 20 times in a day, or once in a week, based on your pace of work and what you've accomplished.
The Command-Line Interface (CLI) aka "Terminal"
One trait that is very common among professional software developers is that they are also power-users of the computer. When was the last time you saw a pro dev using the mouse pointer, double-clicking to slowly do things on their computer? No – you usually see their fingers moving lightning-fast over a text-based interface, heaps of text scrolling by as they fire off commands to have the computer do what they want. What they're doing is using the computer's command-line interface, or CLI for short.
The CLI is simply a way for you to tell your computer to do things by inputting text commands, instead of using the mouse. It's old-school. But it's also a way to do things much, much faster than clicking around all the time, so it's the preferred way for many professional developers to manage files and run software. We'll be using it a lot.
What can you do with it?
Almost anything you'd normally do with the mouse and keyboard. In this lesson, we'll focus on simple things, like how to traverse and browse the directory structure on your computer, move files around, and run programs.
Accessing the CLI
As mentioned, every computer has a command-line interface. On Mac OS, you could access it using the built-in Terminal application or maybe iTerm. On Windows, you'd use Command Prompt or perhaps Powershell. But since we're not using our own computers for development – we're using the cloud-based computer provided to us by Codespaces – we'll use the Codespaces Terminal, in this case.
Start with the main menu in Codespaces (the "hamburger" menu in the upper-left). Choose View -> Terminal.
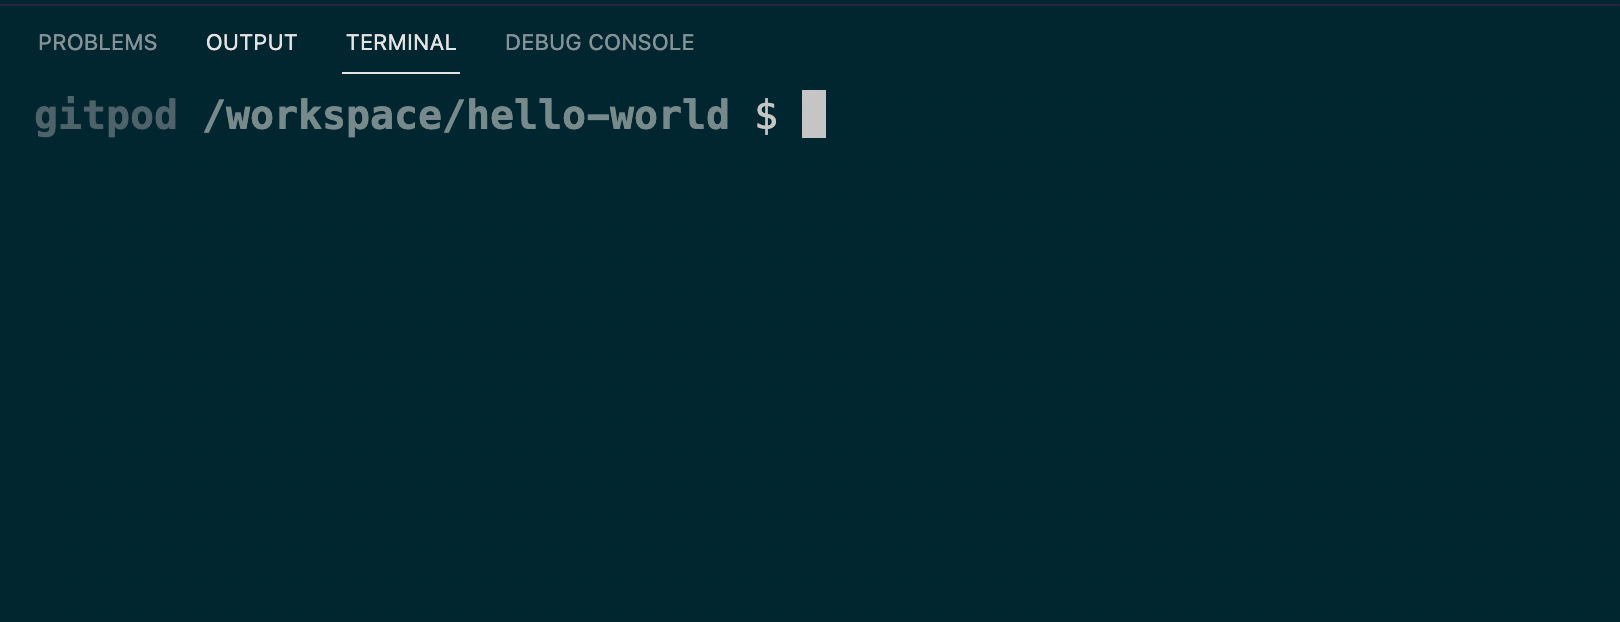
A brand-new Terminal window will open, and is ready to accept your commands. Hit Return a few times. You'll notice that, each time you hit Return, you'll going to be presented with the same Terminal prompt – that is, some text followed by the $ symbol. That $ symbol is telling you that the Terminal is ready to accept your input. This is important to know, because sometimes you won't see it! When you don't see it, that's letting you know that you can't type commands, either because it's still doing something else, or that it's confused about what you want it to do next. Most of the time, you can hit Control-C to get back to the prompt. When in doubt, hit Control-C.
The Working Directory
The first thing you might notice about the prompt is that it always prints the current working directory. What's the working directory? It's the directory that where you're, well... working. Any commands you type are going to apply relative to the files and folders in this directory. To try it out, type ls and hit Return.
ls is the List command. It lists all the files in the working directory. You should see an output similar to:
code images LICENSE README.md
This is a simple list of files in our working directory, and should be the same as the files you see in Explorer in the left sidebar.
You can also create a new directory. Try typing mkdir tacos and hitting Return.
mkdir stands for Make Directory. This command takes an argument, i.e. more words after the command name that are used as inputs to the mkdir command itself. Naturally, it makes a new directory – relative to the current working directory – with the new directory name provided as an argument. You should see a new tacos directory appear in the Explorer.
Traversing directories
Now that you have a new directory, let's make that directory the new working directory. Type cd tacos and hit Return. You'll see that the current working directory has now changed to /workspace/hello-world/tacos.
cd stands for Change Directory. cd accepts an argument of the directory you want to change to. This argument can either be a relative path – like you've done here, i.e. tacos is the name of the directory inside your current working directory – or it can be an absolute path – i.e. the full path to the directory on the computer.
Said a different way, cd tacos works because the working directory is /workspace/hello-world and tacos is a directory inside of it. If your working directory was somewhere else, and you wanted to change your working directory to the tacos directory, you'd have to provide the absolute path, i.e. cd /workspace/hello-world/tacos.
Ok, your current working directory is /workspace/hello-world/tacos – but now you want to change it back to the parent hello-world directory. You could use the absolute path:
cd /workspace/hello-world
And that would work perfectly fine. But there's also a shortcut to change the working directory to traverse up one level, to the parent directory:
cd ..
.. is simply shortcut syntax for "parent directory".
Ok, what now?
Here's just a quick cheat-sheet of other things you can do with files using the CLI.
Try creating a file in the current working directory:
touch hello.txt
You can have a look at its contents, if you want:
cat hello.txt
You can also copy it:
cp hello.txt hello2.txt
Or move (rename it):
mv hello2.txt hello3.txt
Or delete it:
rm hello3.txt
Bonus Level: Expert
There are a couple of ways you can move extra-fast through the CLI. If you've ever watched a pro developer work, this is how they make it seem like they can type at superhuman speeds. The first trick is using the tab key. The tab key is essentially "auto-complete" for the CLI. Type the first couple of letters of a command and hit tab – the command will be auto-completed for you. To try it, type mkd and hit tab – it will auto-complete to mkdir. Works on filenames and pathnames as well.
The other trick is using the arrow keys. ↑will repeat the previous command – and you can use ↑ and ↓to cycle through all recently used commands.
Running Programs
These commands you've been using like ls, mkdir, cd – these are all programs (applications) that are built-in to the operating system we're using (Linux). Of course, you can run our own programs too... let's try it! There's a program located in the code directory called hello.rb. This is a program written in the Ruby programming language, so you'll have to use the ruby command to execute it, i.e. ruby hello.rb. Try typing that now, and perhaps you'll get a message that looks like this:
/workspace/hello-world $ ruby hello.rb
Traceback (most recent call last):
ruby: No such file or directory -- hello.rb (LoadError)
This is an error message that is coming back from the ruby program. Why did you get this? Because you're in the wrong working directory! There's no program in the /workspace/hello-world directory – it lives in the code directory underneath it. So first change to that directory by typing cd code. Now that your working directory is /workspace/hello-world/code, you can try running ruby hello.rb again:
Hello, world!Let's try running the other program in that directory – go ahead and type ruby infinite-tacos.rb.
Tacos!
Tacos!
Tacos!
Tacos!
Tacos!
What a useful program! It simply prints Tacos! forever. You'll notice, though, that you never get returned to the prompt, because the CLI is stuck in the execution of the program. When you want to halt the execution of the program and return to the prompt, Ctrl+C to the rescue - hold down the control key and press "C".
infinite-tacos.rb:2:in `write': InterruptThe program will stop and you should be back at the prompt.
Working with Github Codespaces
As you've seen, Codespaces is simply a cloud-based computer, running the Linux operating system, with a nice code editor (which is actually Microsoft's Visual Studio Code – open source FTW!) and user interface running on top of it.
Everything we'll want to do in this course can be done from the user interface or from the Terminal command-line. But there are a few things which are less intuitive due to the nature of a cloud-based environment.
The first thing is getting files to/from Codespaces from your actual computer. You won't have to do this very often in this course, because almost everything will be provided to you via a GitHub repository. But occasionally you might want to upload your own image or CSV file, or download some output created. Fortunately, doing so is very straightforward. To download a file, simply right-click on it in Explorer and choose Download. To upload a file, right-click a folder in Explorer, and select Upload. Try it now – upload an image from your computer to the images sub-folder.
The other, and more important, thing to know about Codespaces is that your development environment is not permanent. Your workspace will time out and shut down if not used within 30 minutes. No big deal – you can start it back up. To do so, don't follow the same steps as before (Code > Codespaces tab > Create codespace) - that will create a new codespace which may not have all your recent work (and will reduce the available resources on your free plan). Instead, go directly to your Codespaces dashboard and reopen the recent codespace from there - everything will be just as you left it.
That said, eventually an unused codespace – ones that haven't been started up within a 1-2 weeks – are deleted. Don't fret though! There's a simple solution to always preserving your work... commit and sync any work you do in Codespaces back to GitHub... do it early and do it often. GitHub repositories are permanent – they (and the entire history of your work within them) remain in your account unless you explicitly choose to delete them.